Pages

Tuesday, June 16, 2015

DIY Pinterest Inspiration: How to Decorate Your Keys


Hello Everyone! Today I wanted to share with you all this interesting idea that I saw on Pinterest. The only things that I needed for this craft were my keys and one of my favorite decorating tools........

WASHI TAPE!!


I'm sure that I can't be the only one with this problem; I have several of the same looking types of house keys but they all are for different doors/houses. For example, I have my house keys, which are also for different doors at the house and then I also have a key to my grandmother's house. When I first put all my keys on my key ring, I did place them in a certain order so that I could remember which key was which. But over time, my keys got jumbled up and I was not sure which was which so I would have to try each one when trying to unlock the door. 

What could be a possible solution to this problem?

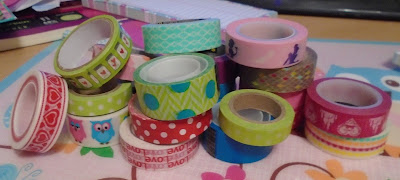
Well,  I was sent a pin with the idea to use washi tape to decorate and differentiate your keys. So the first thing that I did was get my keys and pick which washi tapes I wanted to use. 


I had four keys that I needed to decorate. I decided to use coordinating washi tapes also. 
What I did to decorate my keys was to simply wrap the washi tape around my keys. Around the tops of the keys I used scissors to trim and shape the washi tape. I also put a couple layers of tape around each key due to the fact that some of the washi tape was sheer and I could still see the key thru the first layer of tape. To do this craft, it was really simple and it was rather quick also.

Here is what my keys looked like afterwards...


Overall, my washi tape wrapping wasn't perfect, but I do think that my keys came out looking really cute. And now I can remember which key goes to which lock easier. And another great thing about this craft; the washi tape can easily be removed if I get tired of this tape and I want to put a different designed washi tape on my keys. 

I also think that they added a cute flare to my key chain. :) 


I hope you all enjoyed this post and try this easy craft out on your own keys.
Thanks for reading and until next time.....

XOXO
Kaitlyn 


Thursday, June 11, 2015

Product Empties: June 2015


Hello Everyone! Today I wanted to share with you all some of the most recent beauty products that I have finished. I have split my empties up into several categories and I will share with you all the products that I either have or will repurchase in the future. I will also share with you some of the products that I would suggest skipping on your next beauty shopping trip. 

First up I have my empty hair products.


The products that will be repurchased by me will definitely include the Pureology Colour Fanatic 21. I used it in my damp hair before I would dry it. It did not weigh my hair down or make it greasy. It did make my hair incredibly soft and healthy looking. Another product or products that I have repurchased are the Pureology Hydrate shampoo and conditioner. These hair products are amazing. They also do not weigh my hair down or make it look greasy. They do however make my hair shiny and soft. They also smell like mint which is really refreshing. The last product that I do not need to repurchase because I have extra stocked in my bathroom cabinet is the Batiste Dry Shampoo. If you can not clearly tell my love for this product from the six empty bottles here is a link to another post of mine where I reviewed it and compared it against another drugstore dry shampoo; (Click Here). 

As for the rest of my empty hair products, none of them were horrible, but none of them were amazing either. As for the two different heat protectors that I used up, I usually end up purchasing a different kind every time that I use one up. I will say however that the Nexxus Hairspray would have been a repurchase, but after I bought this bottle, I could never find it again. 

Now for the home products that I used up.


  • Bath and Body Works candles in SMILE pink lemonade punch and Sparkling Berry Fizz. 
I love Bath and Body Works candles. If you just went out and purchased them they can be expensive, but when there is a sale or coupons, you can get them for a good deal. They tend to last a long time for me, even when I burn them 4 to 6 days of the week. I do not believe these fragrances are still available, but they always have new delicious smelling scents come out. I also have a few of these candles stored away from a really good sale. 

Next up is my fragrance empties. 


    I really love these perfumes also. The duo perfume I received a couple of years ago as a Christmas present and the two perfumes separately I picked up at Walmart the day after Christmas for a really good deal. They smell so fresh and fun. I will definitely repurchase these two perfume scents someday, but first I want to try her "Island Fantasy" perfume.  

Now for the makeup.


  • Urban Decay De-Slick Setting Spray
  • Maybelline Dream Wonder Powder
  • Essence All About Matte! Powder
  • Maybelline Great Last Lots of Lashes mascara (Click Here to Purchase
  • Becca Ever Matte Poreless Priming Perfector
My one repurchase from these empties is my Maybelline Lots of Lashes mascara. I have tried tons of mascaras and this is the only one that gives me the look that I want. I love the strangely shaped brush and the formula of this mascara. 

As for the other products; the setting spray was okay. I recently bought a cheaper alternative from L'Oreal to compare and see if it is a budget friendly dupe for the urban decay. The Maybelline face powder I would not recommend if you have really oily skin, which I tend to have. It does make your skin look nice after it is first applied, but you need to touch up quite a bit to keep your skin looking flawless. Also, I had the lightest shade, but it was still a bit too dark for my skin tone. The Essence matte powder also makes your skin look great after you first apply it, but throughout the day it does not keep your skin matte, which was the whole reason that I purchased it. Lastly, the Becca perfector did an okay job at helping my skin stay matte, but I do not think that I will purchase it (this tube was a free sample). 

My last category is skincare/body care.


  • Mud Pac anti stress mask
  • Equate Cocoa Butter Lotion
  • Vaseline Cocoa Radiant Lotion (Click Here to Purchase)
  • Tone Fruit Peel Exfoliation Body Wash (Click Here to Purchase)
  • Degree Motion Sense deodorant
  • The Body Shop Tea Tree Skin Clearing Toner, Cleanser, Lotion, and Oil (Click Here to Purchase)
  • True Blue mini paraffin hand lotion
  • Bath and Body Works Gingerbread Hand Cream
  • Bath and Body Works Cool Amazon Rain body wash 
  • The Body Shop Early Harvest Raspberry body butter (Click Here to Purchase
I really like both the Vaseline Cocoa lotion as well as The Body Shop body butters for all over body moisturizers. I apply them after I get out of the shower. I really like how they absorb into the skin and they do not leave a greasy film on your skin. They are also great at fulfilling their purpose, which is to moisturize. I have several bottles of these lotions both in my bathroom and bedroom. I really liked the Tone body wash and have since bought a new bottle, but in a different scent just because I like to switch the scents up. So far, I have also been enjoying it. The big standout from this group of empties is The Body Shop Tea Tree skincare set. I have a post that I want to write about this set soon, but *SPOILER ALERT* I really love this skincare. I would highly recommend it if you suffer from oily, red, and acne-prone skin. Keep checking back for my future post specifically about it. 

The other empties from this category are much like the hair care products. None of them were awful, but none of them amazed me either. 

Overall, I would say my favorite products that I used up from this bunch were my Pureology and Batiste hair products, my Bath and Body Works candles, my Britney Spears perfumes, my Maybelline mascara, my Vaseline and Body Shop lotions, my Tone body wash, and lastly my Body Shop Tea Tree Skincare. I would highly recommend all of these products, In fact, most of them I have already repurchased myself. 

I hope you all enjoyed this post and that you might try and find some of your new favorite products from my recommendations. If you have any further questions about any of the products or if you have some great recommendations please leave them in a comment below or send them in an email to me at KatchingUpWithKaitlyn@gmail.com

Thanks for reading and until next time...
XOXO,
Kaitlyn 


Tuesday, June 9, 2015

Plan With Me: June 8-14, 2015


Hello Everyone! Today I thought I would share with you how I use my planner.
 I always use my planner during the school year, but now where I have my job and I'm trying to stay  on top with my blog, I need to use my planner throughout the summer also. I was also inspired to do this post and share with you all how I plan because I love to watch these types of videos on YouTube. I hope that this post inspires you to either start planning or if you already plan, I hope this gives you some ideas how to personalize and add pizzazz to your planner. 

First off, let's discuss my planner. I received this planner as a birthday gift last year and I have used it all throughout this past school year. Unfortunately, June is the last month of my planner, which makes me so sad because I love this planner so much. I love the cover design of this planner; it is also hardback which has helped it to stay nice looking. There is tons of space on the inside for writing (which you will see in a moment). This planner was also very budget friendly because it came from Walmart and was under $15.


So now that you all know some details about my planner, let me show you what supplies I tend to use to plan. 


This week I am going to use these four different pens from the brand Zebra I believe, These were a new purchase, but I must say they were very nice colored pens. I also pulled out four different rolls of washi tape, some small sticky notes, and some fun and cute stickers. 

So now that you know what I'll be using, let's start the planning. 


The first step that I did was with my washi tape. I used a fuchsia colored tape horizontally across the top and bottom of my weekly page layout. (BTW my planner starts with Monday on the top left space with Tuesday and Wednesday on that same page. The next page has Thursday, Friday, and then Saturday and Sunday beside each other at the bottom of the right page.) Next I used a striped washi tape (which has a stripe that matches the fuchsia tape) vertically on the two pages. Lastly, I took some decorative scotch tape ( which also matches my fuchsia tape) on Thursday to indicate that it is pay day for my job. 


During the second step of my planning I simply wrote in all of the things that I had to do this week. The picture above shows Monday thru Wednesday. Various things that I had to plan and schedule were my work schedule, basic chores that I need to complete, and errands that I needed to get done on Monday (which was my day off).  The picture below shows Thursday thru Sunday. These days also included things like my work schedule, chores, and also the yard sale that my family is having on Saturday. There was not a reason for labeling my certain tasks with the colored pens that I chose. I simply chose those colors because they also matched my washi tape color scheme. I also used a couple of matching sticky notes to plan chores that I want to get done on those certain days, but just in case I do not complete them on those days, I can move my sticky notes and try to complete those tasks on a different day. I decided not to use any of my cute stickers this week simply because I felt that they were not needed this week. 


Well that is how I schedule out my week in my planner. I hope you all enjoyed this post and if you would be interested in seeing a post like this maybe bi-weekly or monthly please let me know down in the comments. Also, if you have any other requests let me know down below. You can also always send me an email to: KatchingUpWithKaitlyn@gmail.com 

Thanks so much for reading and until next time
XOXO,
Kaitlyn 


Saturday, June 6, 2015

Book Review: Nurse The True Story of Mary Benjamin, R.N.


Hello Everyone! I'm back today with a review on the latest book that I have finished. This book is titled "Nurse The True Story of Mary Benjamin, R.N. " by Peggy Anderson. This book is a nonfiction book, which is a different type of genre than what I usually read. But despite this I still found this book very enjoyable because you all may know from my "About Me" section, I am a nursing major in college. 

To begin, let's start with the synopsis of this book.

"Sometimes I help people live. Sometimes I help them die. Always, I help them. I'm a Nurse. The shocking, inspiring, surprise bestseller Nurse is the story of eight weeks in the life of a nurse in a large urban hospital. It is all here:  the joy and pain; the death and drama; the mistakes, successes, and secrets. Nurse reads like a novel, but sticks in the memory like real experience. Because it is.
NURSE
The True Story of Mary Benjamin, R.N. 


Now for my opinion. 
Overall, I really enjoyed this book. I received it as a gift and like I previously stated, I have not read many books like this before so I did not know what to expect. I was afraid that it would be boring or difficult to understand. But to my surprise, the line from the synopsis is true. This book reads like many of the other novels that I have read before, but you still do you remember that these stories are true, and the people that are involved with them are real. The narrator, who is Mary Benjamin, R.N. speaks to you through this book like you are sitting right beside her. I liked how when she described certain procedures that she would have to perform on patients, she would also describe them so that you, as the reader, could easily understand. You could tell by the way that Mary described her job and patients that she enjoyed being a nurse and this made her very like able. 


I also like this book for the details of  patients that it involved. I do not live in an urban city so I do not know if I will ever encounter some of the situations or people she described, but it was nice to hear about her experiences in her urban hospital because I believe hearing this knowledge is better than not. This knowledge will be useful to me as a nursing student and future R.N. because it will help to keep my mind open to all situations and people that I may someday have to care for. 


This book was an excellent, enjoyable, and easy read. It has helped excite me even more for the possibilities of what I could achieve in my future nursing career. It has also introduced me to a new aisle at the bookstore, because it has made me what to seek out other nurses' stories and experiences. Whether you are a nursing student like me or you are already a nurse, I would highly recommend checking out this book. 


If you all would like to see more posts with tips for applying to nursing schools or as the new school year approaches in August, more info about my experiences with starting nursing school let me know down in the comments or in an email to 
KatchingUpWithKaitlyn@gmail.com 

I hope you all enjoyed this book review. Thankx for reading!

Until next time,
XOXO
Kaitlyn 


Thursday, June 4, 2015

Nail Polish Review: Essie Peach Side Babe


Hello Everyone. I'm back!! The school semester has ended and what a relief that is.  So now that my summer break has kicked off...I thought why not come back to you all with a review on a nail polish that is perfect for the summer. 


The polish that I am talking about is a new shade from Essie. The shade is called "Peach Side Babe".


As you can see the color of this polish is true to the name. Peach Side Babe is a true peach color. I believe that this color will be flattering on many different skin tones. What I love about this color is the fact that it appears to have the slightest touch of pink in it....this faint touch of pink in the color helps keep this polish from looking to chalky on my nails...unlike another color from Essie called Tart Deco, which I do not believe can work for every skin tone. Peach Side Babe however works. 


Now for the swatch....


Another thing about this polish that I love, besides the color, is the formula. Essie is one of my favorite polish brands, but like everything else it can have its duds. This formula however is one of their better ones. In fact, it might be one of the best Essie formulas that I have ever tried. Peach Side Babe went on in two opaque coats. The formula was very smooth and not streaky. It was also not too thin or thick of a formula so it  made clean up around the cuticles very easy. 


Overall, I would rate Essie's Peach Side Babe a 4.5 out of 5. I love the color of this polish and I think that it is universally flattering and the formula is wonderful. The only downfall to this polish is the fact that it is a limited edition shade for Essie's summer line...So if you want it you better go looking  because I predict this shade will sell fast. I found my bottle at Walgreens for $8.50. 

I hope this review has made you excited for summer....and hopefully what is to come on my blog. Thank you so much for reading. If you are some of my original readers and have stuck with me through my break thank you for coming back....If you are new readers welcome! Be sure to check back soon.

Until next time,
XOXO,
Kaitlyn